Table of Content
This creates another point of contact with a high level of friction, helping to resist rotation. It's not the most bomb-proof technique, but if you want to protect your climbing surface from screw holes and you can't block the hold in place, this is worth a try. Pronged T-Nuts are the easiest to find, cheapest, and simplest to install option, but they are more prone to spin out, popping out the back, and blowout . They are simply hammered into place, but this means if pushed from the front they can just come right out.

For example, space red handholds farther apart to make a difficult route or place green handholds close together to make an easy route. Some handholds can be attached with screws without a T-nut on the back. Anchor the framework to your existing wall or support system. Drill anchor screws through your frame and into the studs of your wall or support. Add screws every 12 in or wherever you notice the frame bowing away from your wall or support. Use a pencil and a tape measure to mark your horizontal boards where you need to place a support beam.
T-nut Spacing on a Climbing Wall
Structural plywood is best and comes in sheets of 2400 x 1200 mm. The flange is the flat section of the T-nut that sits perpendicular to the axis of the barrel or sits flush with the backside of the plywood panel. Its function is to prevent the T-nut from being pulled through the plywood. Generally speaking, the wider the flange, the smaller the risk of blowouts. Strong, consistent, uniform plies laminated with high quality, low toxicity adhesives.

Frames can vary in shape and weight depending on the shape and height of the wall you plan on building. Use a pencil along with tape, string, and tacks to draw your design on the wall where you plan to build. Make sure everything from the drawing fits well in the actual space, or adjust your design so it fits the space. Hands-on activities are fun for Girl Scouts of any age, but they also help them feel empowered to shape their own experience. Girl Scouts unlock their “I got this” attitude as they discover they can always dust themselves off and try again when things don’t go according to plan. Rock climbing definitely makes you stronger, especially the first few months.
Building the Wall Itself
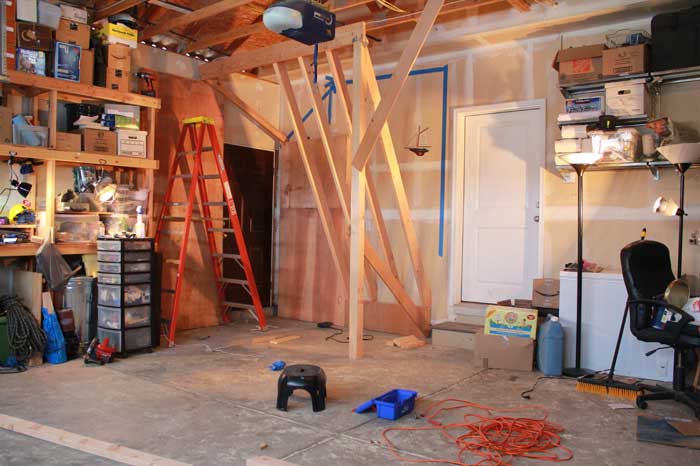
If you’re not planning on using your setup frequently, a scaled-down and less expensive design might be a better option. Building the whole wall on the ground means you’ll have to lift it up to the raised wall position. Putting the frame together in an upright position is an option but takes careful planning beforehand.
To ensure that the rebar runs uninterrupted to the top of the wall, add more rebar with a 32-inch lap. The lowest portion of the wall should be backfilled to the regular ground level and then compacted. Your wall will be better able to withstand strong winds and avoid toppling over with this soil fill at the base. Install a footing made of concrete that is at least eight inches thick, twenty-four inches wide, and 2 or 3 feet below the ground’s surface using reinforcing rods . To do this, set the holds so that moving from one to the next is within your comfort zone.
Building a Climbing Wall
They are inexpensive, mildly corrosion resistant, and do their job very well. Besides being out of the way, these spaces are often left “raw” meaning the 2×4 framing of the walls may still be exposed. If you opt for this type of unfinished space, you can easily drill into the studs and not build a new frame to go on top of a sheetrock wall. You may either use ready-mixed concrete to fill the holes, or you can use bags of pre-mixed concrete and mix them in a wheelbarrow. Beams of 4 inches by 6 inches should be galvanized with bolts measuring between 5/8 and 3/4 inches long. Install plywood sheathing with a thickness of three-quarters of an inch over the beams using nails or screws, and then finish with paint or textured paint.
We will discuss this in more depth in the Fasteners section. This is the most common method employed in the US and the easiest type of structure to attach a climbing wall to. This means you have a 1.5” window to hit that stud, and with certain fasteners, it is more or less critical to be on center. You may already have a place for your wall in mind, but there are a few things to consider before you start drilling.
Holds
Apply a masonry cement or synthetic plaster finish coat after the scratchcoat has dried thoroughly.Concrete block . Place a concrete footing, a minimum of 8 inches (20.3 cm) thick, 24 inches (61.0 cm) wide, with reinforcing rods, 2 or 3 feet (0.6 or 0.9 m) below grade . Stick number 5 rebar dowels 16 inches (40.6 cm) on center into the concrete, with 48 inches (121.9 cm) projecting upwards for block cell reinforcement. Lay up your block , filling each cell that has a reinforcing rod with mortar as you go.
The term “on center” refers to spacing the center of each board at the specific distance. In this case, the center of each support board should equal 16 in . Aim to have the width of your wall around 4 feet (1.2 m) and the height around 8 feet (2.4 m).. A free-standing wall is best if you want to transport it or if you’re renting. I got into extreme sports about 20 years ago and am a die-hard adrenaline junkie.
The more challenges you can give yourself, the more apt you are to continue training on your wall. To prevent the strips from splitting, pre-drill holes through the depth of the strips before inserting the screws. Then make sure the screws go through the plywood, drywall, furring strip, and the stud inside the wall.
Prices start at around $200, making them an affordable option for most families. Cut two 2x4s into 8-foot long pieces and two more 2x4s into 4-foot long pieces. Assemble the frame using nails or screws, ensuring the corners are square. Once the anchors are in place, you can start attaching and removing climbing holds as desired. To install an anchor, first drill a pilot hole into the plywood. Ensure each anchor is driven into a stud to provide extra support.
By following these steps, your wall will start to look more like it is. Cover the lath with a half-inch coat of masonry cement plaster. This “coat,” also known as the scratch coat, must be scored so that the finish coat may adhere to it. After the scratch layer is completely dry, you should add a final coat of synthetic plaster or masonry cement blocks of concrete . In addition to this, you should get started sketching the kind of wall that you desire. So if you have specific needs, you may need to supplement your hold supply with standard commercial holds.


No comments:
Post a Comment